beauty

'The $20 product that made me love my hair again.'

My relationship with my hair is a bit of a complicated one.

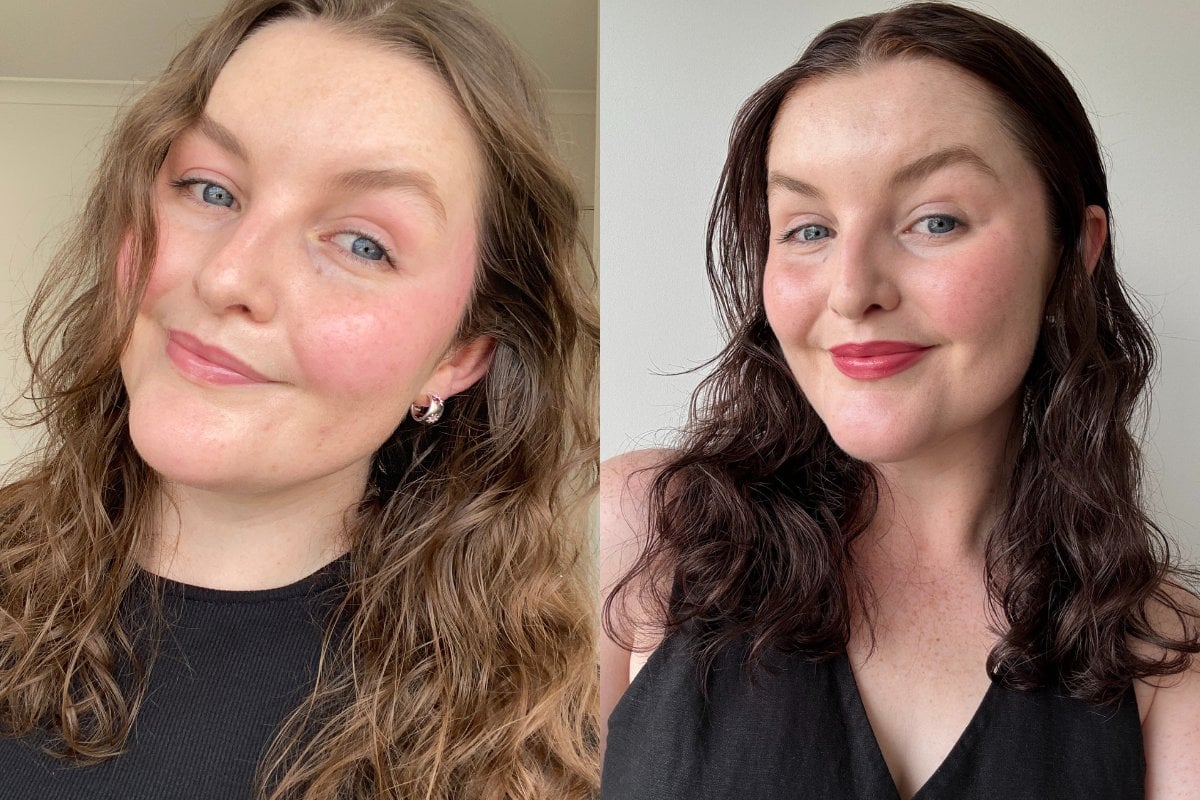
I love the curl and bounce that it gets but the natural colour has always felt a tiny bit... meh. In fact, if you ask my friends what I complain about most, it’s probably my hair (and never knowing what I should do to change it). 

Previously I've only dabbled ever so lightly in the world of hair dye: an interesting attempt to introduce highlights that just brought out the red undertone in my hair (think: tiger stripes) or that time I bleached the bottom two inches so that I could put a green tint in.

No, it did not look good. 

Watch: Mia Freedman talks colouring her hair. Post continues after video.


Video via Mamamia

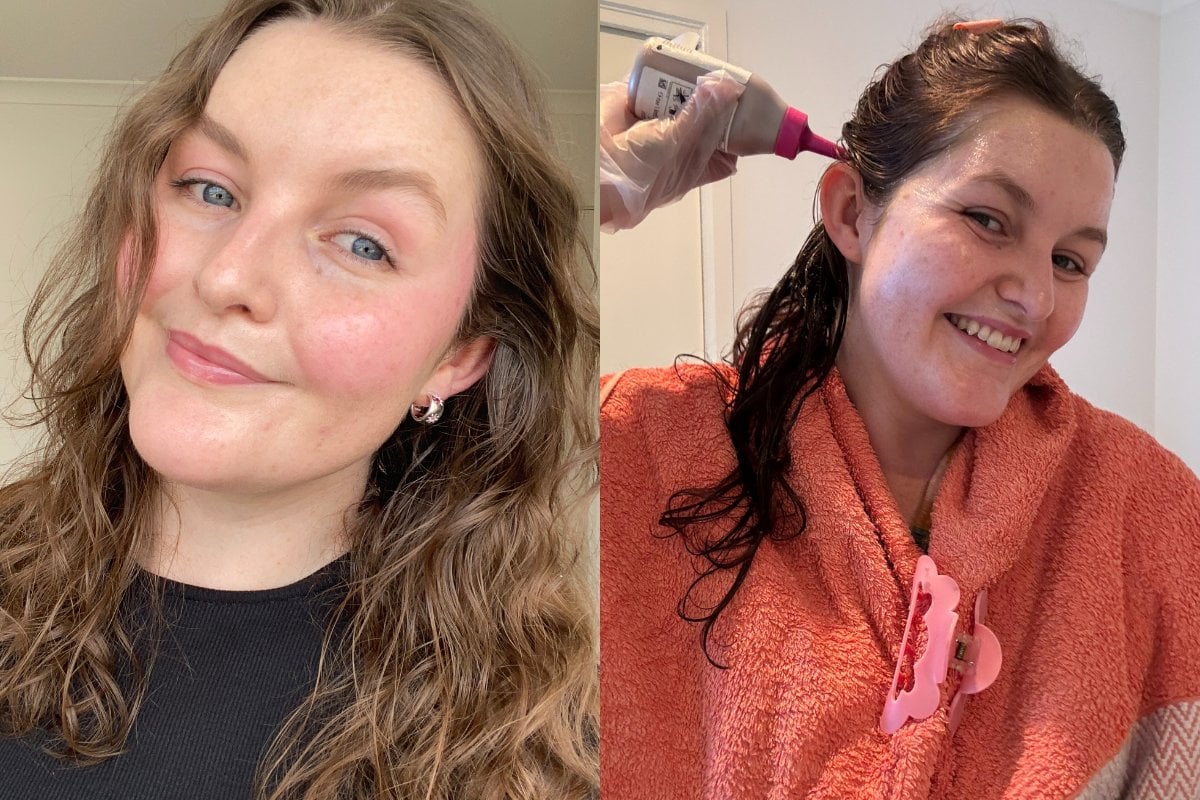
Needless to say, I didn't have an exact purpose when I ended up in the hair aisle at the supermarket a few weeks ago, not even thinking that I would dye my hair or switch up the shade. Really, I just wanted something that would put a little pep in my step and give it the freshen-up it desperately needed.

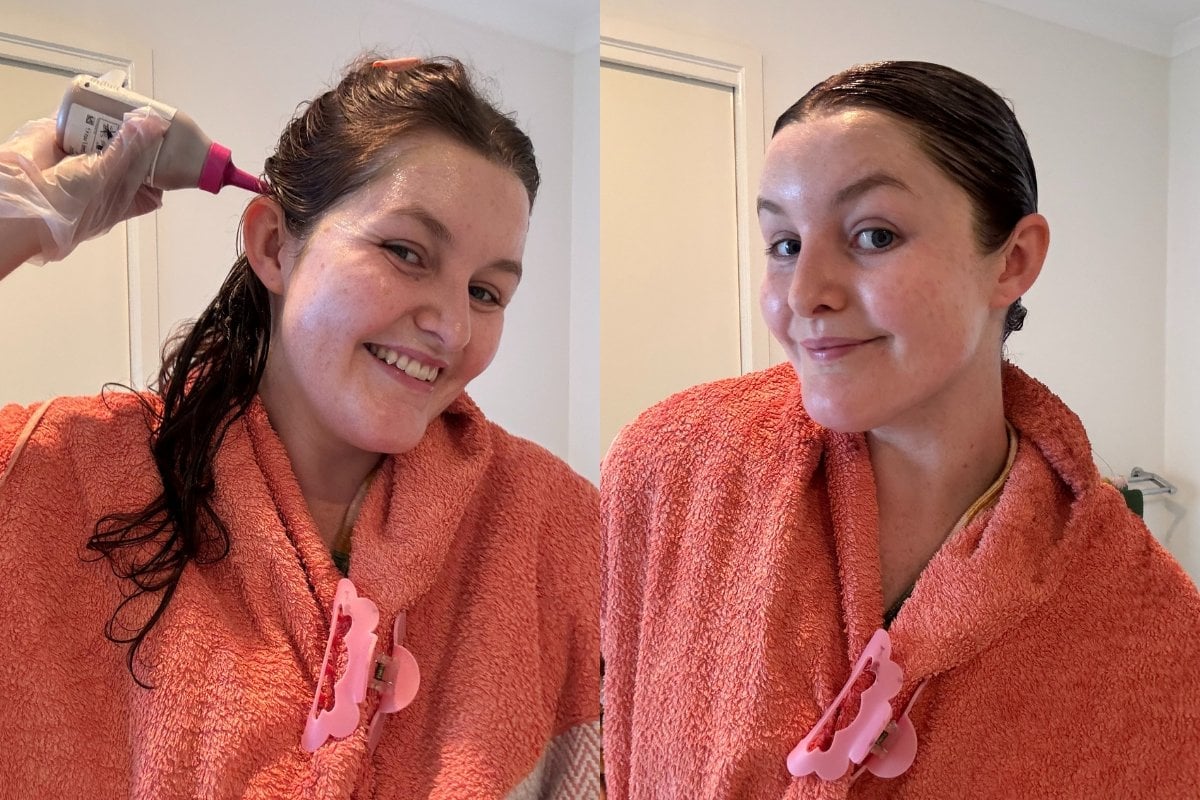
I was quite surprised when I ended up taking home a colour-casting gloss — I blame my impulsive Sagittarius tendencies — and immediately dyed my whole hair. 

ADVERTISEMENT

So, let’s get into what I bought and how it went…

What is it?

The product I picked up is the L'Oréal Casting Creme Gloss in the shade 'Iced Chocolate', and it's $20 from Priceline (although you can often find it for less). 

It's described as a conditioning colour formula, so it delivers the colour while also nourishing the hair and giving it a more glossed-up, shiny finish. There's no ammonia in the formula and it’s non-permanent, claiming to last up to 28 shampoos. 

This felt like the ideal product for what I needed — a fresh colour, some shine and low commitment if it all went terribly wrong.  

How did it go?

Applying it is actually a very simple process. I washed my hair the night before and made sure it was nice and dry, then in the morning I did the dyeing process. 

Following the instructions that come inside the box, you start by mixing up the coloured formula and applying it directly to the hair. It is still a dye, so make sure that you wear an old shirt or wrap a towel around your shoulders so that you don’t stain anything of value. I also applied a layer of Lanolips 101 Ointment at the very edge of my hairline and on my ears to help prevent any dye stains on the skin. 

The process! Image: Supplied.

ADVERTISEMENT

Gloved up and ready to go, I sectioned my hair back with clips and starting at the roots, began to apply the dye and massage it along the strands. It’s worth taking your time with this step and making sure that you really work the product in thoroughly and evenly. 

I recommend reaching for a plastic comb that you can use to make sure the product is well distributed throughout. (The kit comes with a lot of product, so I had no issues making sure that my longer-than-shoulder length hair was completely covered).  

You only have to leave it on for about 15 to 20 minutes before washing it out, but please check the colour guide on the back of the box beforehand so you know what results you can expect. 

ADVERTISEMENT

Oh, and be careful (especially if you rent!) near any light-coloured tiles or basins. 

The verdict.

This may be the best $20 I’ve ever spent on my hair.

Once my hair had dried, the difference in the colour was quite striking but also felt like the perfect fit, like it was maybe even the shade that my hair was supposed to be. I would describe it as sitting 3-4 shades darker but with a more red base and cool undertones. You can see the before and after below. 

Here's what my hair looked like before and after:

Image: Before (left) and after (right).

ADVERTISEMENT

In addition to the change in shade, it felt significantly softer, shinier and looked for perhaps the first time, quite brilliant. For very little effort, maybe 30 minutes, I got that extra oomph and impact that I was looking for, along with a boost in confidence that I did not expect, but was certainly welcome.  

This was actually my second time using this product and it had been nine whole weeks before I felt I could do with a refresh. Since it's semi-permanent, the colour does wash out and fade a bit over time, but in my opinion, it was very gradual and natural-looking. 

Here's my hair after nine weeks:

Image: Supplied.

ADVERTISEMENT

If you weren't keen to repeat the process, you could absolutely just let it continue to fade away.

An additional benefit I noticed was how I approached my makeup and outfits to suit my new hair tone. I deal with a lot of redness in my skin and the darker hair actually feels like it minimises the appearance of that, meaning that I felt confident to go without a makeup base more frequently. 

This second time around, it feels a little darker again and the perfect timing to start reaching for chocolate brown and burgundy hues in my outfits without feeling like I'll look washed out in comparison. 

When it comes to my hair, I'm big on low effort with a big reward and the Casting Creme Gloss is exactly that for me. 

Only $20 and a little time every two months to keep it looking fresh and giving me that daily confidence boost? Absolute game changer.

Have you tried a colour-casting gloss before? What was your experience? Share your thoughts with us in the comment section below.

Feature Image: Supplied.

Love watching TV and movies? Take our survey now to go in the running to win a $50 gift voucher.